How to share a large library of files using P2P (Deluge) on Unraid ?
I want to share a large library of movies to a coworker who is looking into jump-starting his NAS with some content. What would be the best way to do so ?
Option #1 : I could create a user account for him to connect directly to my Unraid server through SFTP. However, this meant exposing an SFTP port to the internet which is really not recommended. To prevent this, I could share a WireGuard VPN certificate with him to avoid exposing an SFTP port to the internet but that meant giving him access to the Unraid WebUI... Not really a valid option.
Option #2 : I could add my movie library to my NextCloud instance. This meant indexing all the movies (~700) into NextCloud database. While this is not really a problem for my use case, it is not really practical for larger libraries. Also NextCloud does not really support download failures which is huge a problem when dealing with TB of files.
Option #3 : Create a torrent files with all the movies I need to share and share it with the P2P torrent installed on Unraid. This has multiple benefits : file integrity checks, download stop, pause and fail handling...
The first drawback is that I have to create a .torrent file linked to TB of data. The way I understand it, my P2P client will have to parse through all the files to compute their hashes (in pieces) and append these to the .torrent file metadata in order to create it.
The second drawback is that Unraid has to read TB of data twice : once to create the .torrent file and once when my coworker decides to download it.
The third drawback is that I have no way to control when my coworker will download the data potentially slowing my NAS in a delicate moment. I can however throttle him through the deluge scheduling and upload options.
Option #4 : Take a HDD home with the risk of damaging in using public transport and dump my files on it. As explained in the relevant xkdc, FedEx has more bandwidth than the internet. Taking a drive home is the fastest option in most cases. Still, there would not be any blog post using this option. Let's forget this for the sake of my first article.
That being said, I opted for option #3.
Option #3 requires a P2P client, my Unraid NAS already has deluge binhex VPN docker container installed. I highly recommend it, it is available through the community application tab under the tag binhex/arch-delugevpn. I assume you have the default docker configuration already working on your Unraid server for the rest of the tutorial.

Step 1: Install Deluge Thin Client on your PC
Sadly, you can't create a torrent directly from the deluge WebUI. You have to install a deluge client on your PC in order to create a torrent file. Still, I want deluge docker to create the torrent file using Unraid filesystem directly; not my PC. I don't want my PC to read the file on Unraid to create the torrent file. Here is a diagram of the desired working way :

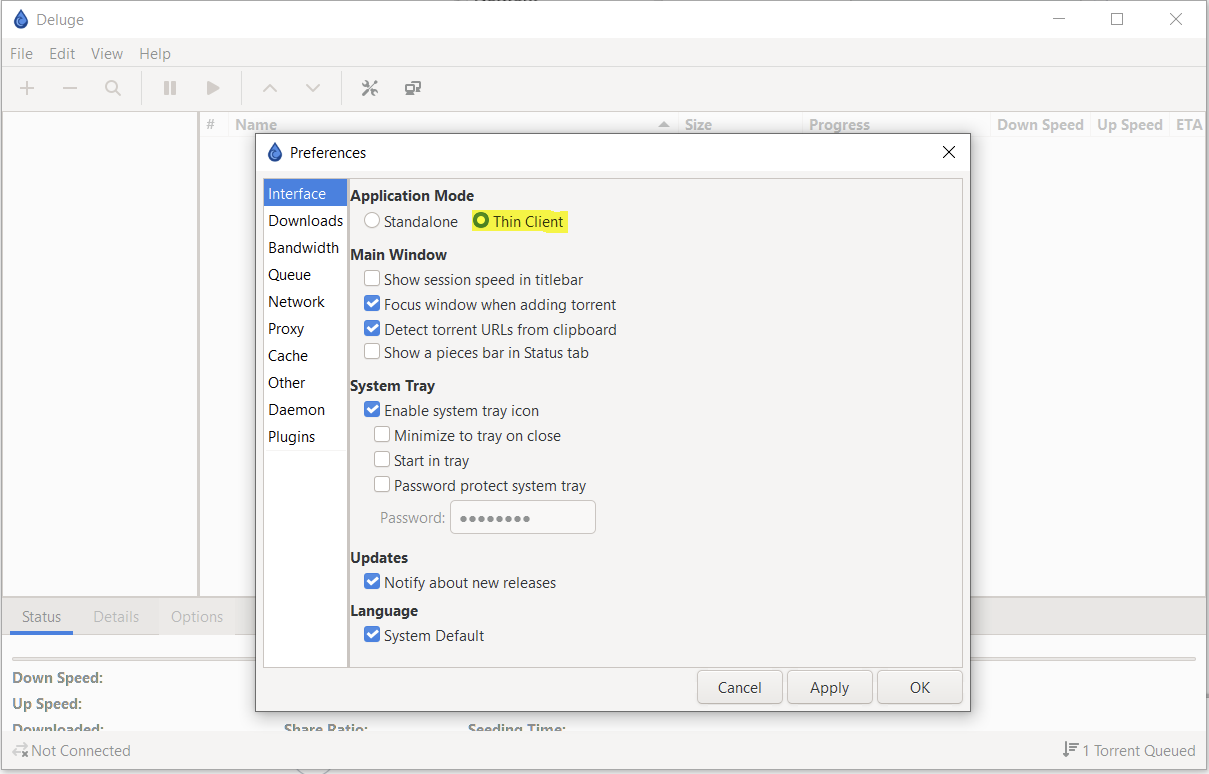
Download deluge client : https://deluge-torrent.org/download/ and activate the thin client mode. We do not need the standalone mode as my Unraid server is already running the deluge daemon. The thin client is effectively a "remote" for our Unraid Deluge container.
Step 2: Configure the connection between Deluge Container on Unraid and your PC
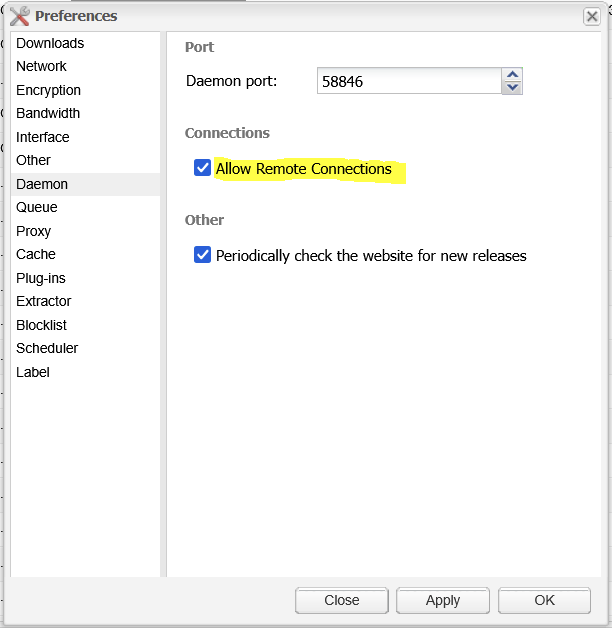
Deluge daemon (inside the binhex docker container) does not allow remote connections from remote thin clients by default. First, make sure you have a port forwarded inside your container for the thin client connexion. I use the default port : 58846.

Then configure your Unraid Deluge container to allow remote connection to the deluge daemon :
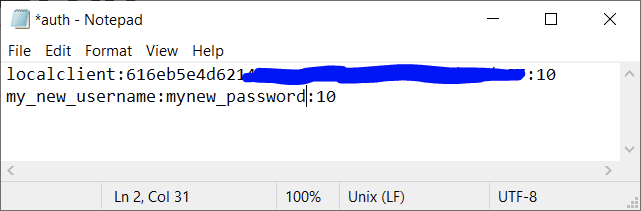
Add a new user to the Deluge Daemon to allow your PC to connect to the container. Everything is explained in the following documentation https://deluge-torrent.org/userguide/authentication/.
The file you need to change is located in user\appdata\binhex-delugevpn\auth. Append a line with your username, your password. :10 at the end of the line means you want to give this user admin privileges.
user:password:10
You can now connect to your Deluge Container with the thin client by selecting the connection manager icon, "Add" and then typing your connection credentials.
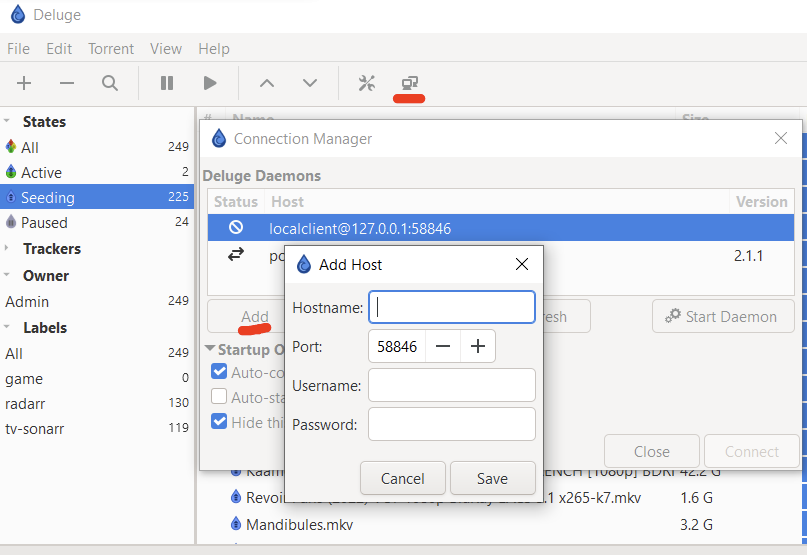
- Hostname: 192.168.1.37 (your Unraid server IP)
- Port: 58846 (the port configured in your Unraid Deluge docker template)
- Username: ..., the one you defined in the
authfile. - Password: ..., the one you defined in the
authfile.
Step 3: Add the share to Deluge container
In my case, the movie Share in Unraid was not readable by my deluge container. I had to manually add it in the docker configuration. You just have to edit your docker template configuration, scroll down and select "Add another Path, Port, Variable, Label or Device". Here is the configuration I added :

The share is now reachable by to the container under the folder /library_share in read only (just to be safe).
Step 4: Create your torrent (finally !)
On your PC follow the following steps.
-
On the top left :
File > Create Torrent -
Select "Remote Path" and type
\library_share, clickOK
If everything is right you will see something like this :
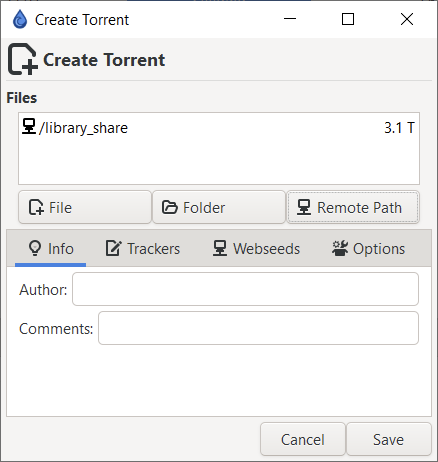
- Hit
Save, you will be prompted to select the folder in which you want to save your torrent. - In my case I typed
user\appdata\binhex-delugevpnas I am sure the container has write access to the location (it is not the case in the\library_sharelocation).
By clicking save, all the data in the \library_share will be parsed by deluge container at your drives' maximum speed.

After a while (!!!), it will create the torrent file in the right place and I can finally share it with my coworker.