Smart Plant Watering System with HomeAssistant
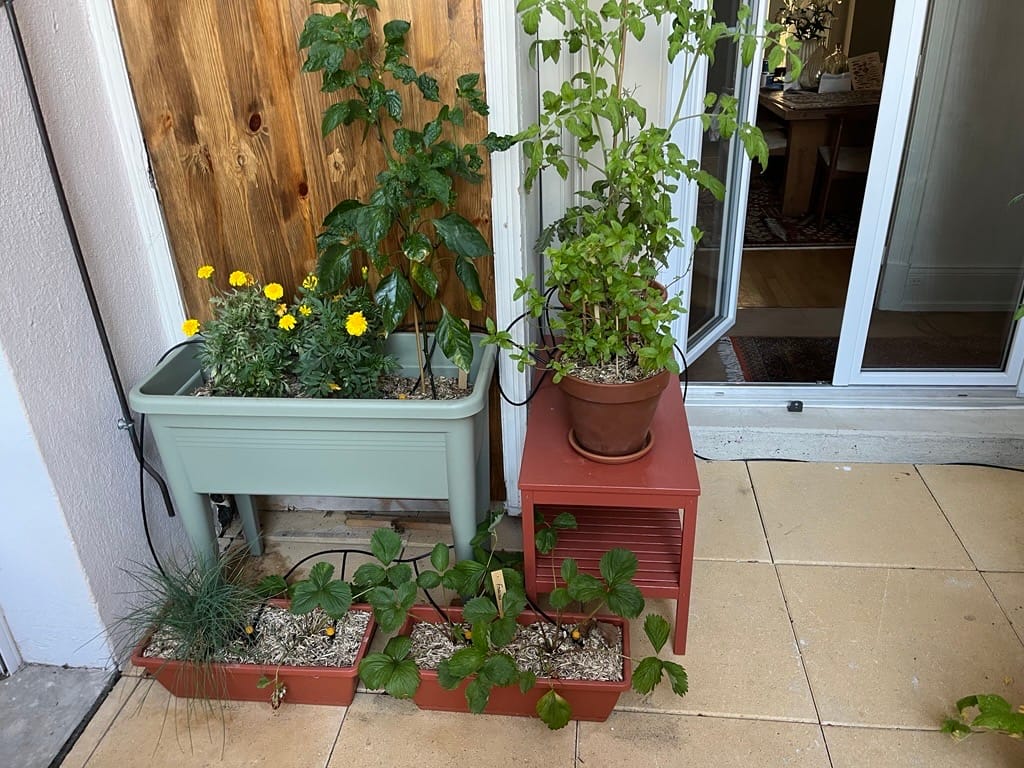
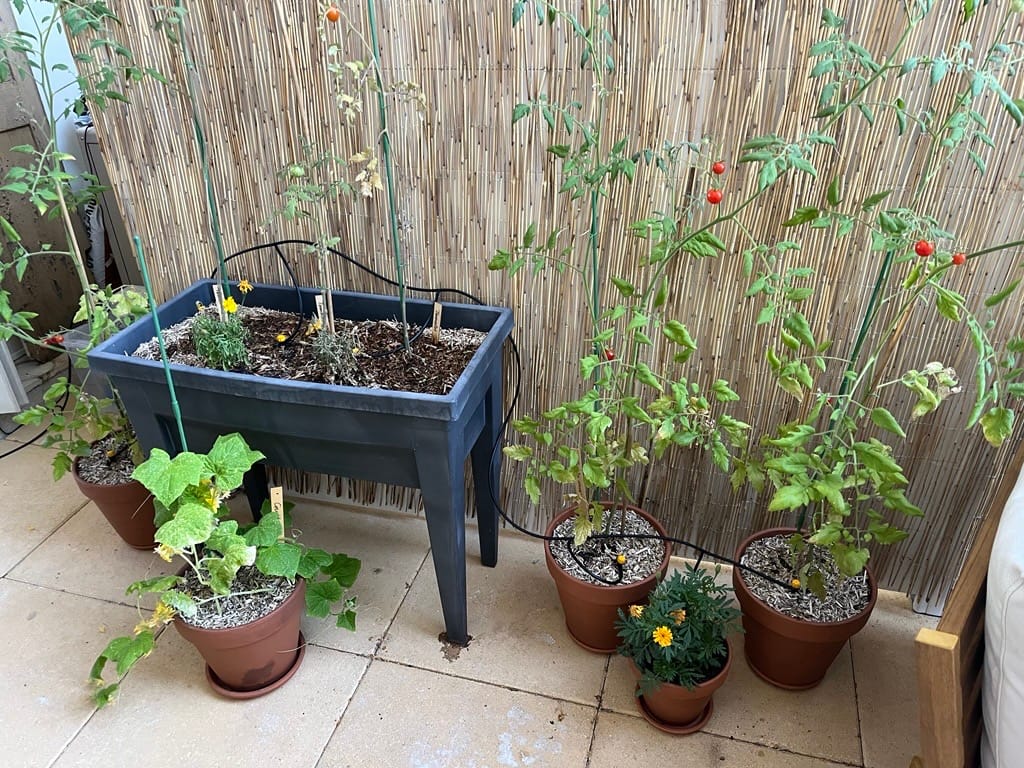
Summer is coming, everyone above 30 years old in my circle try to grow vegetables. I cannot compete with friends with a garden, I have a small patio. Still, let's try to make the most out of it by automating the watering process. I have probably spent more time on this project than I would have spent just watering the plants like everyone else. If I can't brag about my vegetables, I can brag about the connected garden and how it's integrated in my smart home setup !
General Idea
It's pretty simple:
- I want to connect a water pump to HomeAssistant to water my plants on-demand.
- My patio does not have running water close-by, a water reservoir is fine. I need to be able to tell how much water is left on the reservoir. Running the water pump without water can burn it down.
- Watering the plant on demand is fine but we can automate it further by checking for the weather and the soil humidity level. The system then needs a soil humidity sensor. Weather information is pulled from the internet using HomeAssistant.
Prerequisites
This project assumes you have a HomeAssistant server already running on your local network. I am running it in docker (which is not standard) here is my docker-compose in case you need it:
services:
  homeassistant:
    image: homeassistant/home-assistant:2026.4.2@sha256:4c940155cfd5b0187a6faee2db5d52b98bb573edc1aeee95d0818bb17b6534d7
    restart: unless-stopped
    environment:
      -  TZ=${TZ}
# Home Assistant web interface is proxied through Caddy but still
# accessible on LAN using the port 8123
    network_mode: host  # Access to OSI Layer 2
    volumes:
      - $BASE_PATH/homeassistant:/config
    cap_add:
      - NET_ADMIN # Bluetooth adapter control
      - NET_RAW # Raw Bluetooth/HCI socket access
Here are the components I bought (I'm based in France):
- A running HomeAssistant server.
- A water container, any that fits the pump is fine.
- A 12V power unit to power both the ESP32 and the water pump.
- A 12V water pump to... well pump water.
- A 12V to 5V buck converter to power the ESP32 without blowing it up.
- A 3.3V relay for the ESP32 to control the pump
- Some tubing to guide the water to the plants
- RCWL-1670 ultrasonic sensor to sense the water level (waterproof to prevent any damage from condensation)
Soldering Time !
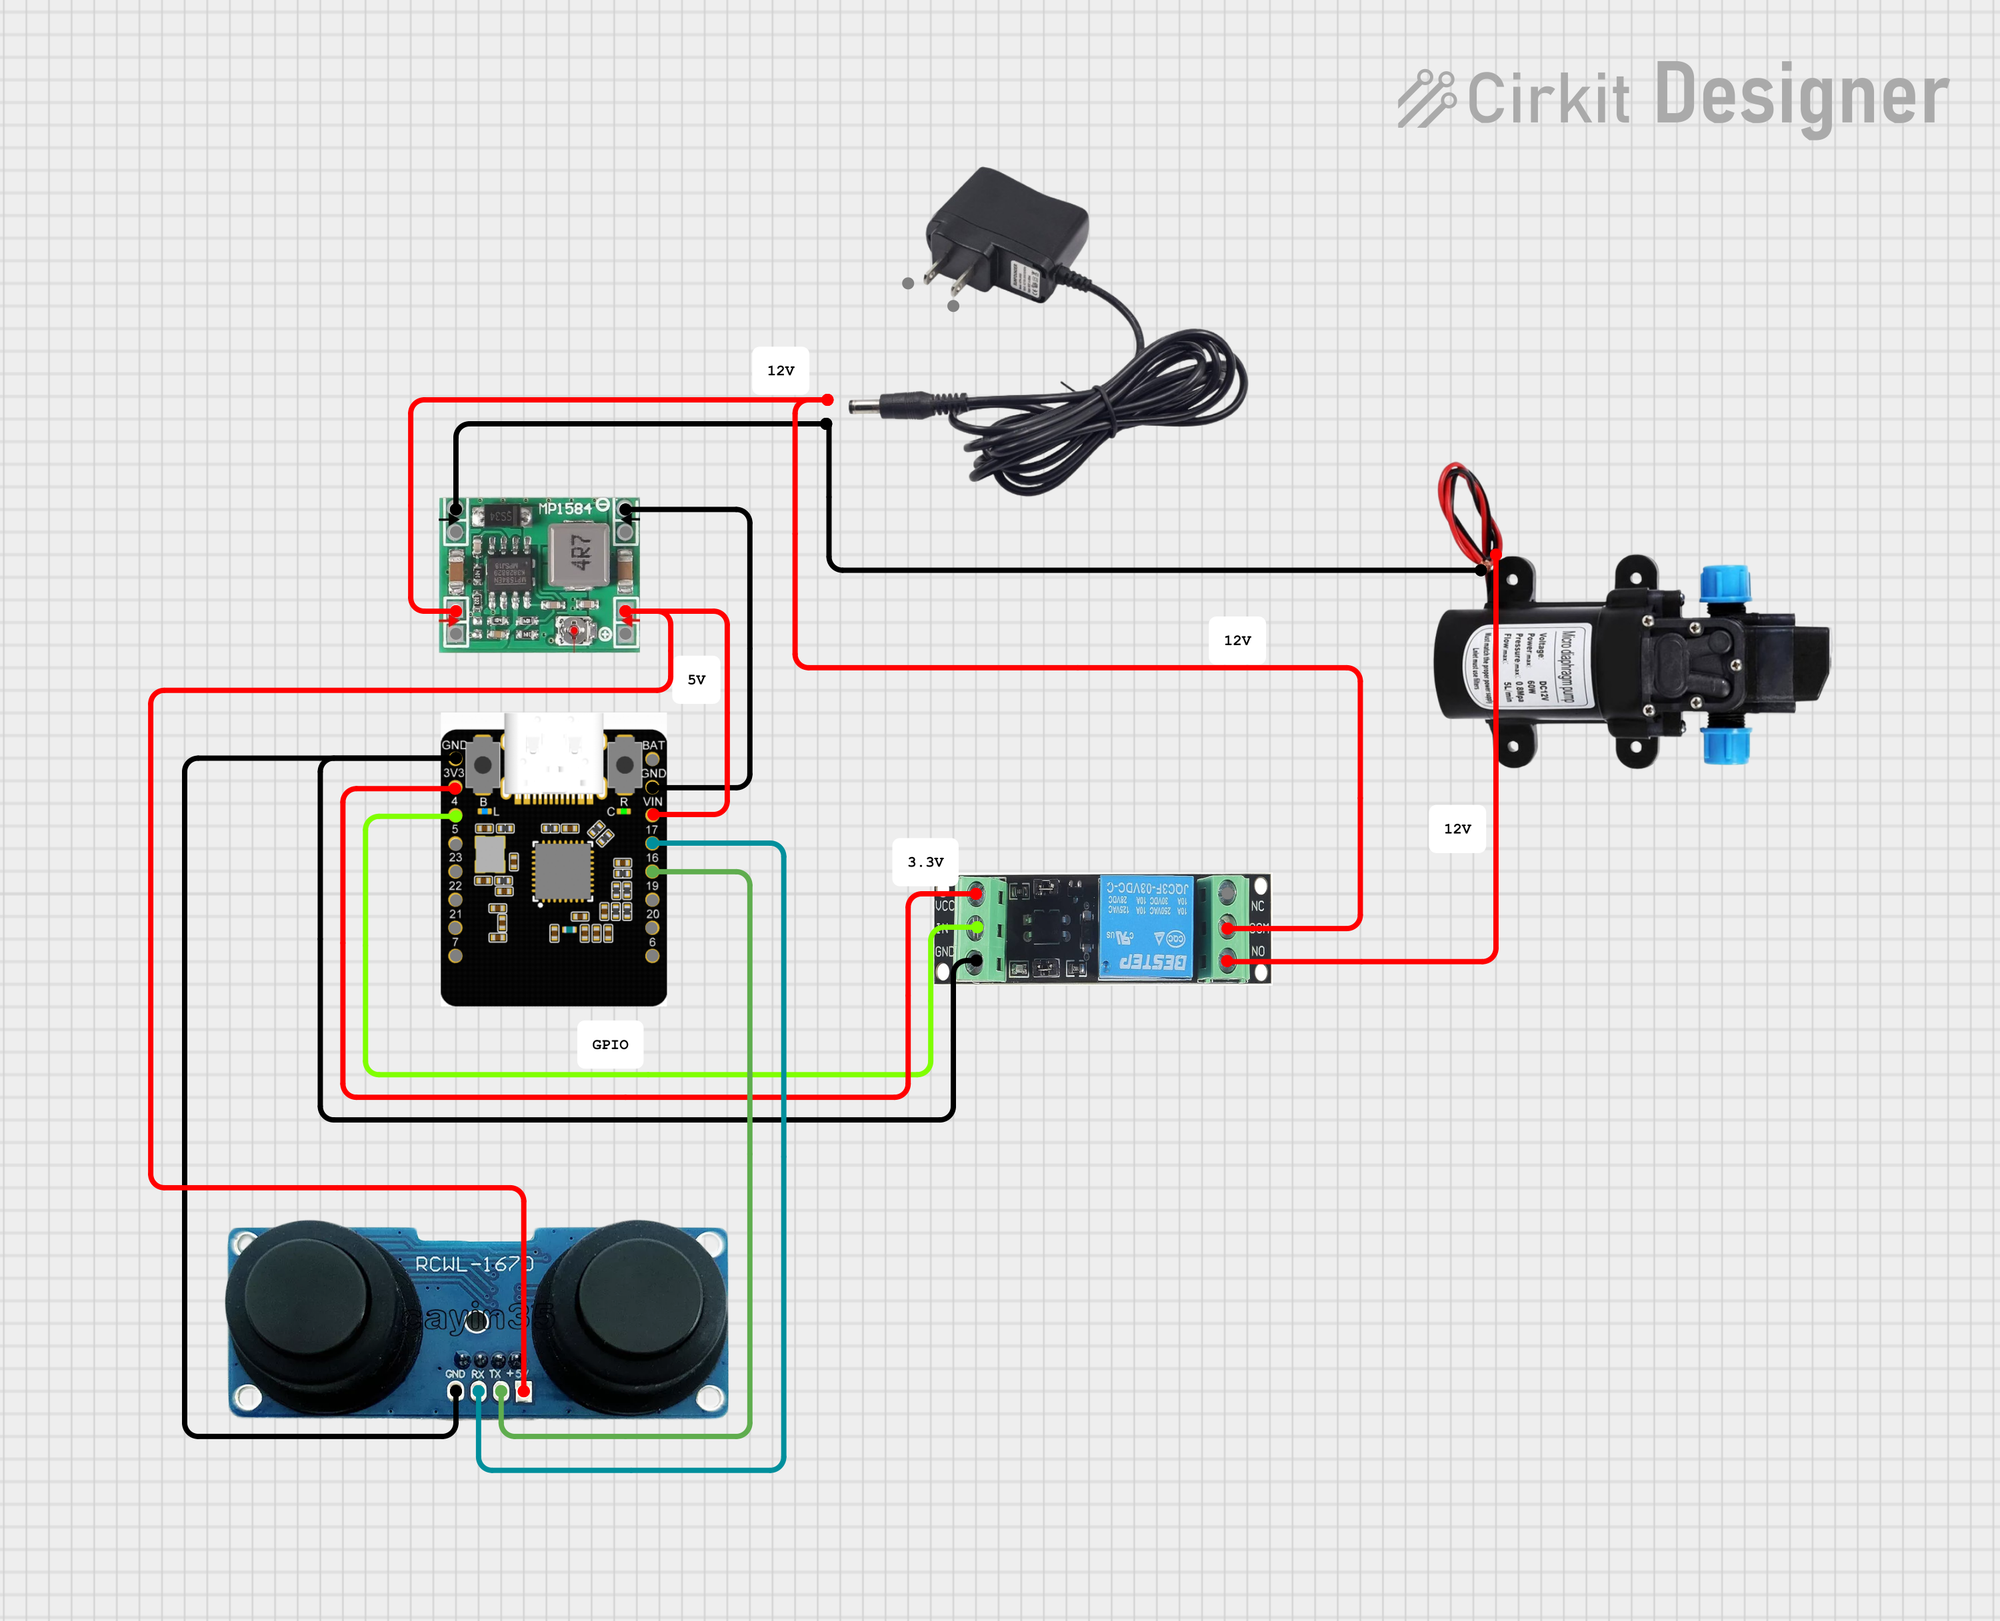
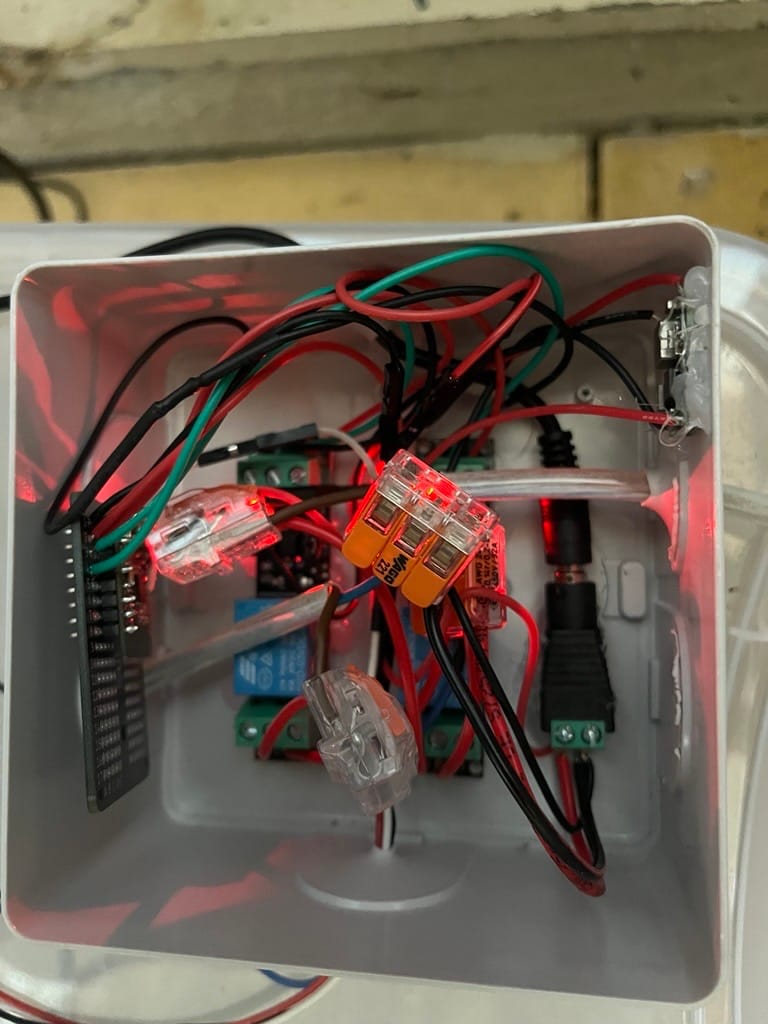
With all the components at hand we just have to solder everything together.
I have a 12V power supply and a buck converter (12V to 5V) to power both the ESP32 and the ultrasonic sensor.
The pump is directly connected to the 12V power supply. Powering it through the ESP32 is not an option : we use a relay in a NO setup.
The ultrasonic sensor uses UART. We have to use the TX & RX ports on the ESP32 (check the documentation if your ESP32 is not a fire beetle).

Tinkering !
As the water reservoir I decided to use a cheap 5€ plastic box. I drilled a few holes to allow cables and tubing inside. For the electrical components, I bough a two electrical boxes, they are quite cheap and watertight.
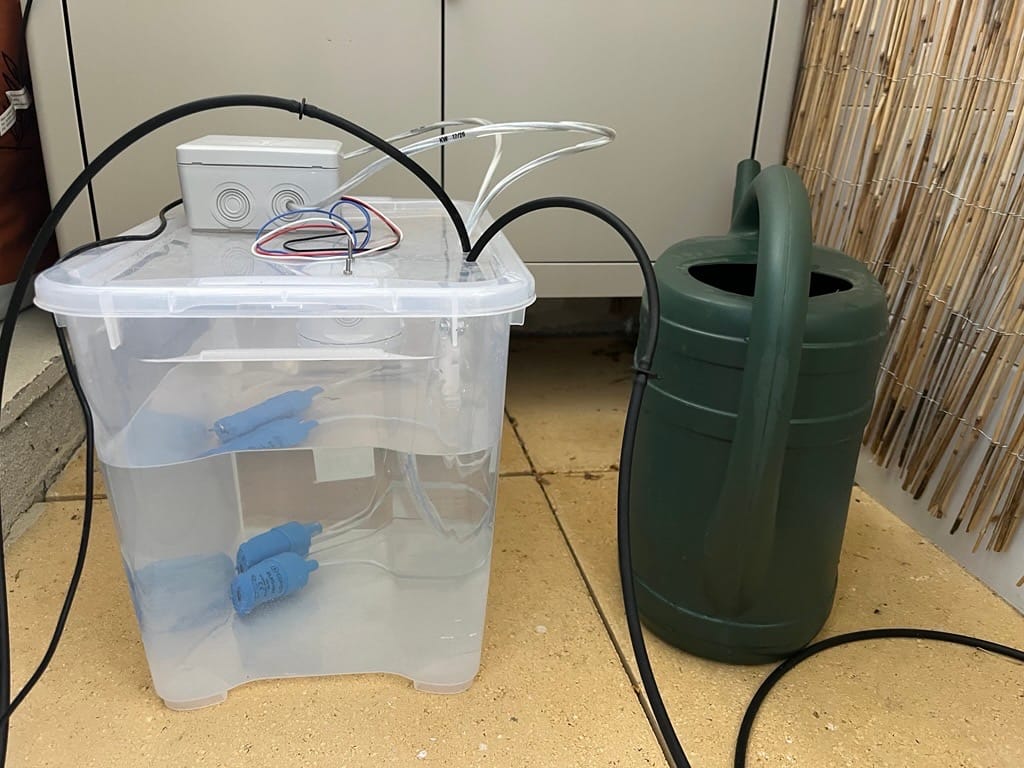
ESP32 software
I'm using ESPHome to code the functionalities on the ESP32. It has native integration into HomeAssistant. In the code bellow I setup:
The board type, board: esp32-c6-devkitm-1. Choose the dev-kit appropriately, your device will crash if it is not the correct one. I first chose the wrong dev-kit everthing worked fine but I experienced crashes after 2-3hours because the code was trying to write above the memory limit of my board.
Wifi, without power saving. I had issues with disconnecting devices otherwise... Don't let the device scan for SSID, it's not worth it.
A switch for the water pump. After 4 minutes the pump automatically stops. I really wanted this kind of security in the code rather than in HomeAssistant. In the even the ESP32 loses connectivity the pump will not work for more than 4 minutes.
An ultrasonic sensor with adaptative polling. I read that an ultrasonic sensor can be disturbing to some animals (dogs, birds...) as it is quite loud even if we don't hear it. With this setup you can adapt the polling rate depending on the pump state. The sensor directly takes into account the height of my water tank, it's possible to do that in HA but it's cleaner this way.
esphome:
  name: plant-watering
  friendly_name: plant-watering

esp32:
  board: esp32-c6-devkitm-1
  variant: esp32c6
  framework:
    type: esp-idf
  flash_size: 4MB

# Enable logging
logger:
  level: DEBUG

# Enable Home Assistant API
api:
  encryption:
    key: !secret plant_watering_key

ota:
  - platform: esphome
    password: !secret  plant_watering_ota

wifi:
  ssid: !secret wifi_ssid
  password: !secret wifi_password
  fast_connect: true  # Disable Wi-Fi scanning, direct connection to ssid
  use_address: 192.168.1.83
  power_save_mode: NONE


# external_components:
#   - source: github://luar123/zigbee_esphome
#     components: [zigbee]

# zigbee:
#   id: "plant_watering"
#   components: all # to add all supported components

switch:
  - platform: gpio
    pin: GPIO04
    name: "Pompe Eau 1"
    id: water_pump_1
    on_turn_on:
      - component.resume:
          id: distance_sensor
          update_interval: 1s
      - delay: 4min # 5s for testing
      - switch.turn_off: water_pump_1
    on_turn_off:
      - if:
          condition:
            switch.is_off: water_pump_2
          then:
            - component.resume:
                id: distance_sensor
                update_interval: 6h

  - platform: gpio
    pin: GPIO05
    name: "Pompe Eau 2"
    id: water_pump_2
    on_turn_on:
      then:
        - component.resume:
            id: distance_sensor
            update_interval: 1s
        - delay: 4min
        - switch.turn_off: water_pump_2
    on_turn_off:
      - if:
          condition:
            switch.is_off: water_pump_1
          then:
            - component.resume:
                id: distance_sensor
                update_interval: 6h


sensor:
  - platform: ultrasonic
    trigger_pin: GPIO17
    echo_pin: GPIO16
    name: "Niveau Eau"
    id: distance_sensor
    update_interval: 6h # Controlled by the interval block below
    unit_of_measurement: "cm"
    filters:
      # Adjusted to your 20.5 cm tank height
      - lambda: return 20.5 - (x * 100.0);
You can flash the ESP32 software either using the online tool (use Chrome as you need to pass-through you USB port) or by self-hosting an ESPHome container. I went the self-hosting way to allow OTA updates on WiFi.
HomeAssistant
Here is what it looks like in HomeAssistant once setup with a few adjustment to improve the looks :
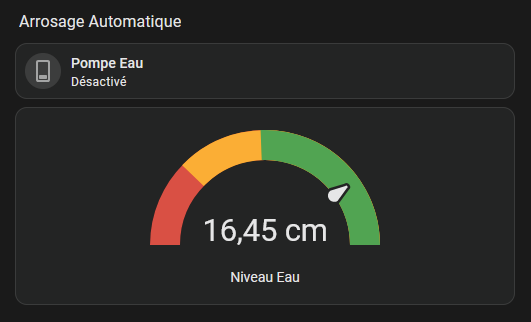
This is the YAML code for the above dashboard :
cards:
  - type: heading
    heading: Arrosage Automatique
    heading_style: title
  - type: tile
    entity: switch.plant_watering_pompe_eau
    grid_options:
      columns: 12
      rows: 1
  - type: gauge
    entity: sensor.plant_watering_niveau_eau
    min: 0
    max: 20.5
    needle: true
    unit: cm
    severity:
      green: 10
      yellow: 5
      red: 0
    name:
      type: entity
HomeAssistant Automation
I recommend to also setup an automation to prevent the pump to remain on once the water level starts to be lower than a treshold. The following automation stops the pump and sends me a notification if the water level drops below 5 centimeters :
alias: Stop the pump
description: ""
triggers:
  - trigger: numeric_state
    entity_id:
      - sensor.plant_watering_niveau_eau
    below: 5
conditions:
  - condition: state
    entity_id: switch.plant_watering_pompe_eau
    state:
      - "on"
actions:
  - action: switch.turn_off
    metadata: {}
    target:
      entity_id: switch.plant_watering_pompe_eau
    data: {}
  - action: notify.mobile_app_your_iphone
    metadata: {}
    data:
      data:
        url: /lovelace/plants
        clickAction: /lovelace/plants
      message: "Pump stopped : Fill the water tank"
mode: single
That's it ! I still don't have anything to harvest but I hope that was helpful.